
It was inevitable that Randall the excavator would have to come back. This time it was for drainage, both downspouts and footing drains. The rains have started back up again and some groundwater was coming through the old and crusty front wall so I couldn’t get him back soon enough.
If you remember, we did put a drainage system on the interior of the house, which was chronicled in the Beams of Light post. Unfortunately none of the water makes its way under the footing and into the perforated pipe inside the house. I surmise that the hardpan soil that the foundation is sitting on is too dense to allow the water through. We had discussed putting in an exterior footing drain around the old wall but didn’t want to until there was a structure on top to keep the wall in place. Once the structure was in place we were still a little worried about digging down to the footing but it was something we had to do given the water intrusion.
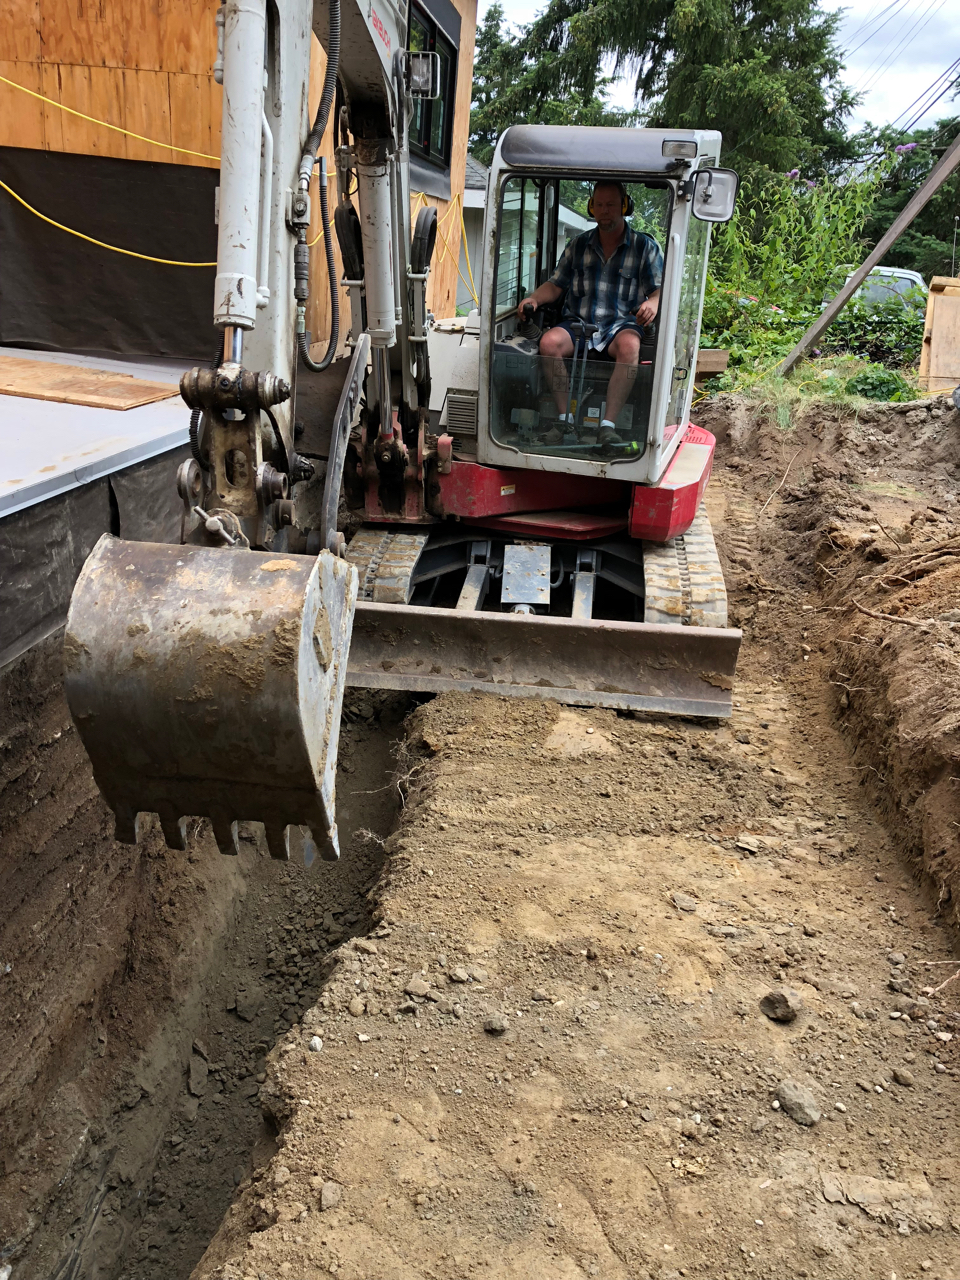
We started by digging all the way down on one side of the foundation and working our way across. A shelf at 4 feet deep was also dug next to the deeper portion to provide stability so there wasn’t one 8 foot deep hole. The whole thing was around 7 feet wide. As usual the soil was glacial till so it was tough to dig and didn’t pose any risk of caving in. I was fine with that because I had to get in the hole and put in the pipe.
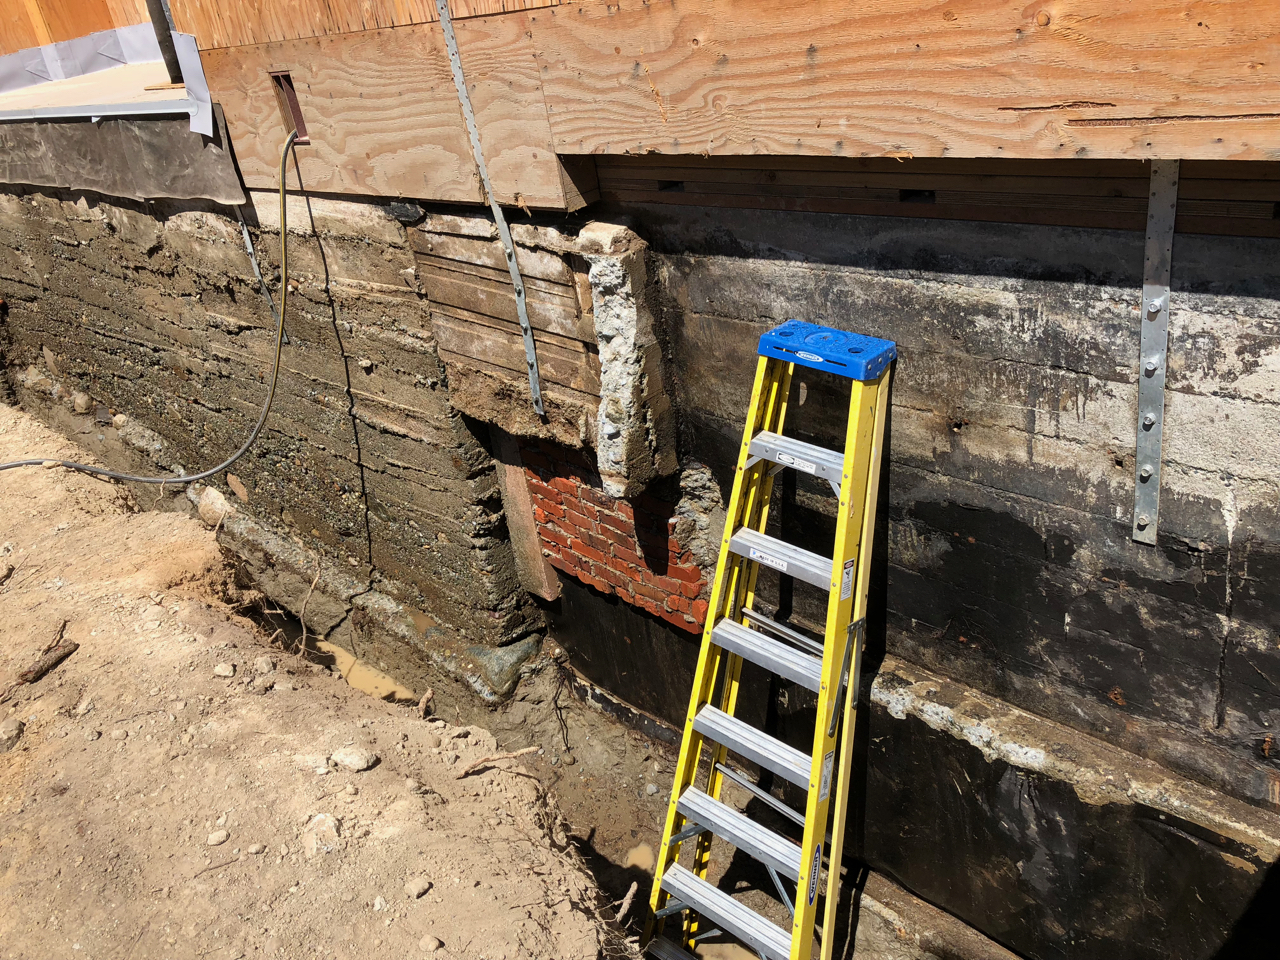
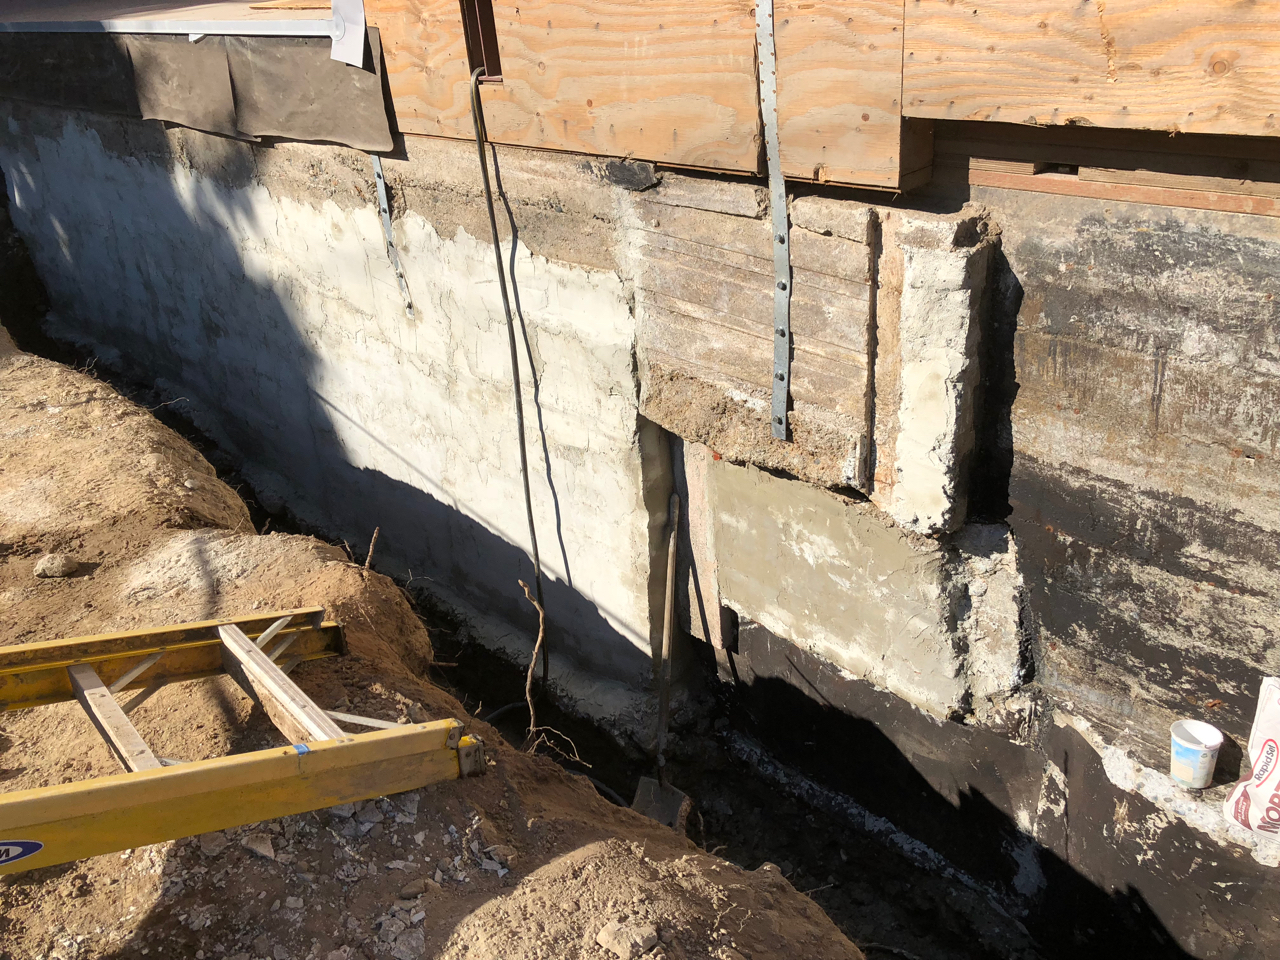
Now it was time to get the wall waterproofed, which was the most challenging aspect, as it turns out. I called the waterproofing company and they were not happy with the condition of the concrete. It all needed to be parged (coated with cement to make it smooth). The next day I set out with bags of concrete, trowels and a mixing pale to parge the wall. I used a fast set cement mix so it went pretty quickly and the wall quickly smoothed out. The before and after photos below tell the tale. The before wall looks worse than it really was given that there is a very thick section of concrete in front of the brick.
Before:
After:
The waterproofers came out soon after and sprayed a thick tar like waterproofing on and applied a dimple board over that. The dimple board is an important part of the system. It has 3/8″ dimples that allow the board to stand off of the concrete wall. This breaks the surface tension that the water creates and provides a path for any water that gets in there to quickly makes it way to the bottom and out the drainage pipe.
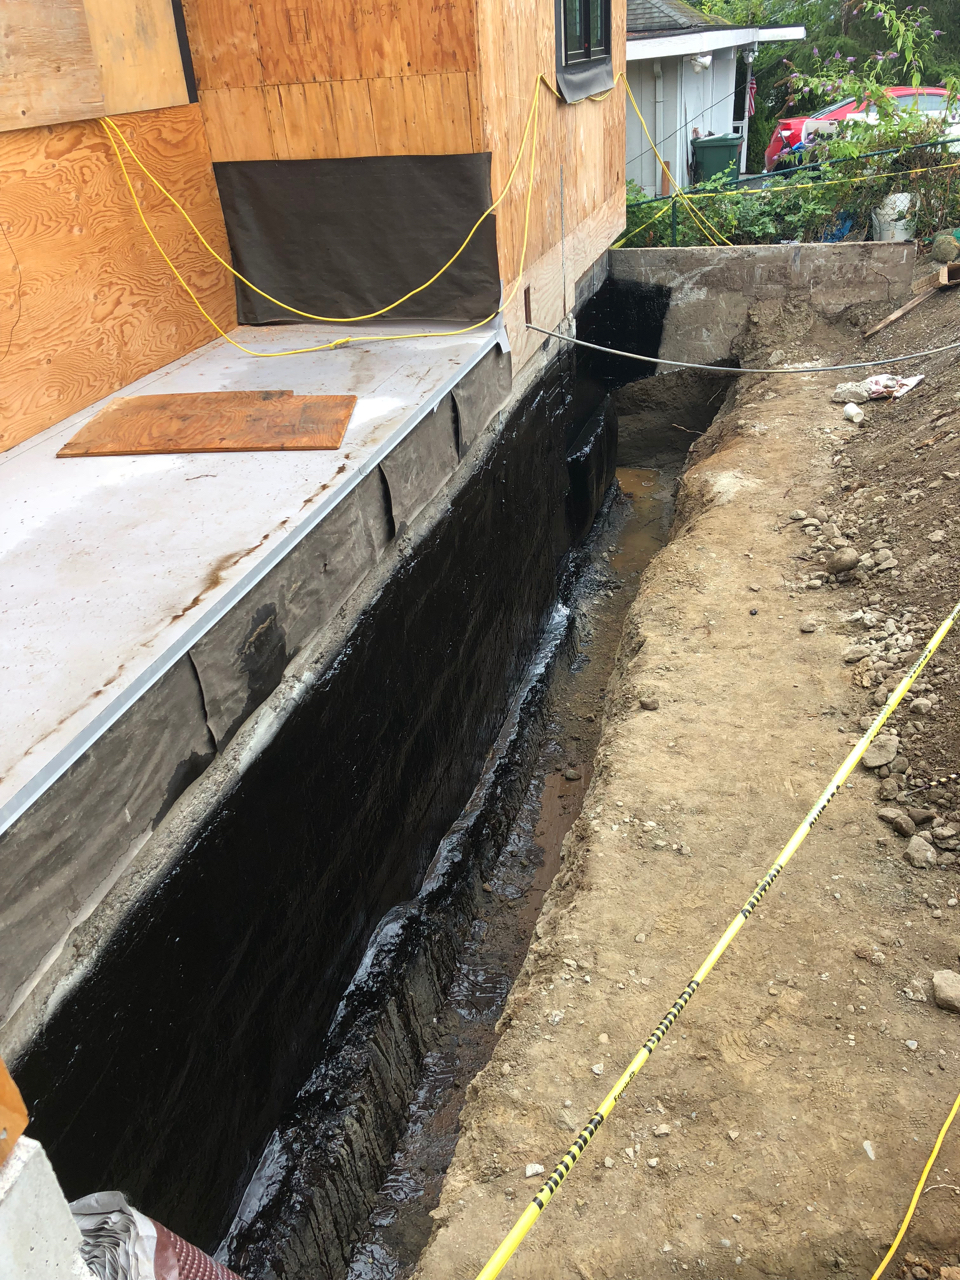
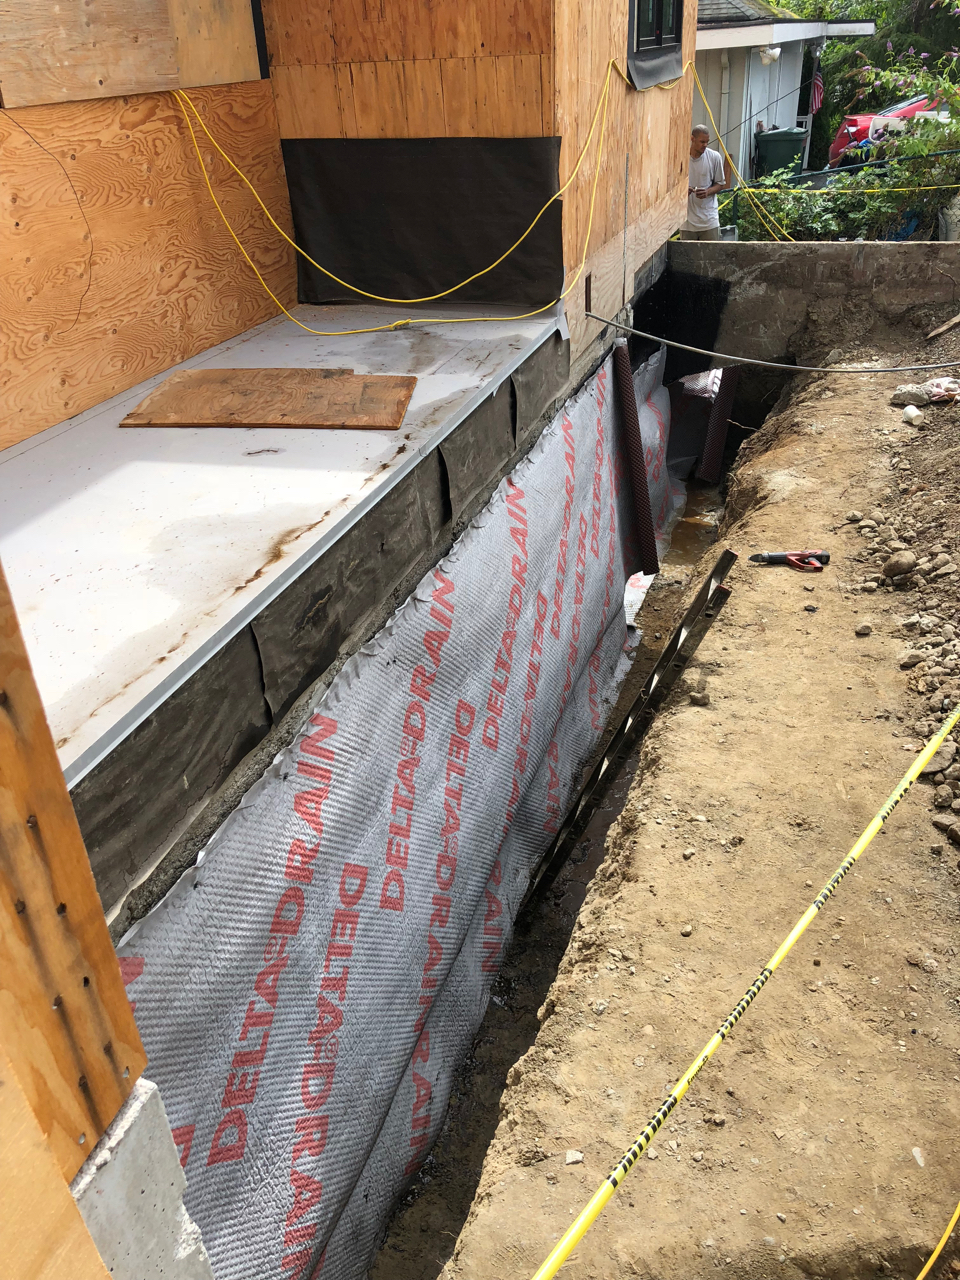
Next up was to put the pipe in the hole and get this monstrosity filled back in. I got the perforated pipe in the hole and glued it up while Randall picked up a dump truck load of gravel. We filled the hole all the way to the shelf cut with gravel, which is way more than usual, but we wanted to make sure it was going to work for a long time. We then put some filter fabric over the gravel, to prevent soil from mixing in, and fill the rest of it with soil.
Now it was time to get the downspout drainage in and finish up the footing drain in front of the garage. This work was going to be much quicker to dig and get done. Randall started by digging a 4 foot deep hole in front of the garage. I jumped into action and got the wall pressure washed, coated it twice with a brush on tar coating and got the dimple board hung. We put some perf pipe in the bottom and ran the downspout hard pipes across the front yard and connected all the pipes together. There are no storm drains in our neighborhood so we have to disperse all water collected into a dispersion trench on our property. That will happen at a later date.

We filled it all back in and all of a sudden, it was done! Randall graded the yard back out and he was off. The project has grading season restrictions so we won’t be able to do anymore grading / digging until April. Randall is kind of upset by this but it’s best to avoid an argument with the city.